STEP BY STEP CHICKEN DUM BIRYANI RECIPE TUTORIAL| HOMEMADE CHICKEN BIRYANI HYDERABADI DUM BIRYANI


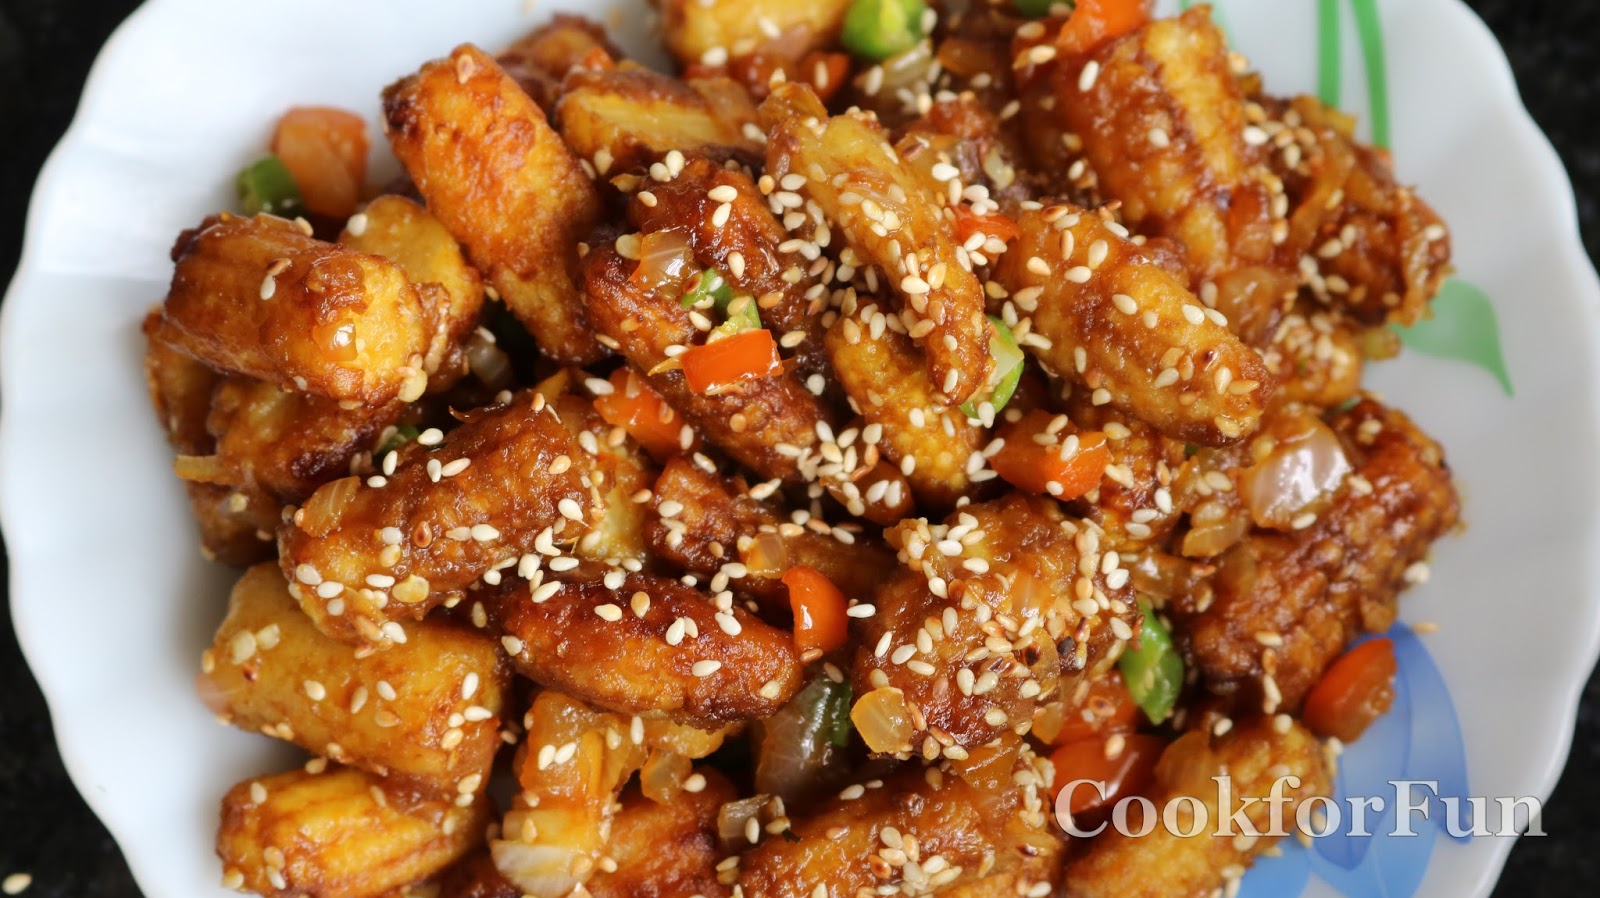
I don't know about you but I love me some chicken biryani. It was brought to India by the Persians and over time, we have made it sort of our own . It is rice cooked with spices and marinated meat and when I say spices I mean a lot of spices . Before you proceed , disclaimer : this is no cake walk  and requires patience and some preparation so don't expect to whip out a perfect biryani like a special effort dinner. This is more than that. Biryani can be considered somewhat like Brad Pitt of rice dishes , its that good! However, its not overly technical . Sure the list of ingredients is long, but it is worthed. So before I take you on a tour to biryani land , here are some technical points to remember :
  1. Whether using chicken or mutton ( a grown lamb) , make sure you use it on the bone and in large chunks. Bone has a lot of flavor  and small pieces may cook to quick and turn dry or chewy. 
  2. Choose the correct rice . Traditionally Basmati is used which is a long grain , fragrant variety of rice. It has less starch content making it fluffy and separated. Most short grain rice have a lot of starch and turn gluggy which is why they are perfect for dishes like risotto . 
  3. Not overcooking the rice (or the meat) : Rice is par boiled then cooked in dum (steam) and considering basmati is a pretty delicate rice , you need to be careful not to overcook it. Check after 6 minutes of boiling , it should be only 70% cooked , which means it will still be resistant to crush.
  4. Frying the onions : The brown onions are an integral part of this dish. They impart flavor and to get that flavor , you need to fry the onions on low heat. Do not under any circumstances crank up the heat . Onions have natural sugars in them and when they are heated , the onions become sweet. However , we need to caramelise the sugars slowly and not burn them as they will give off a bitter taste to the rice.
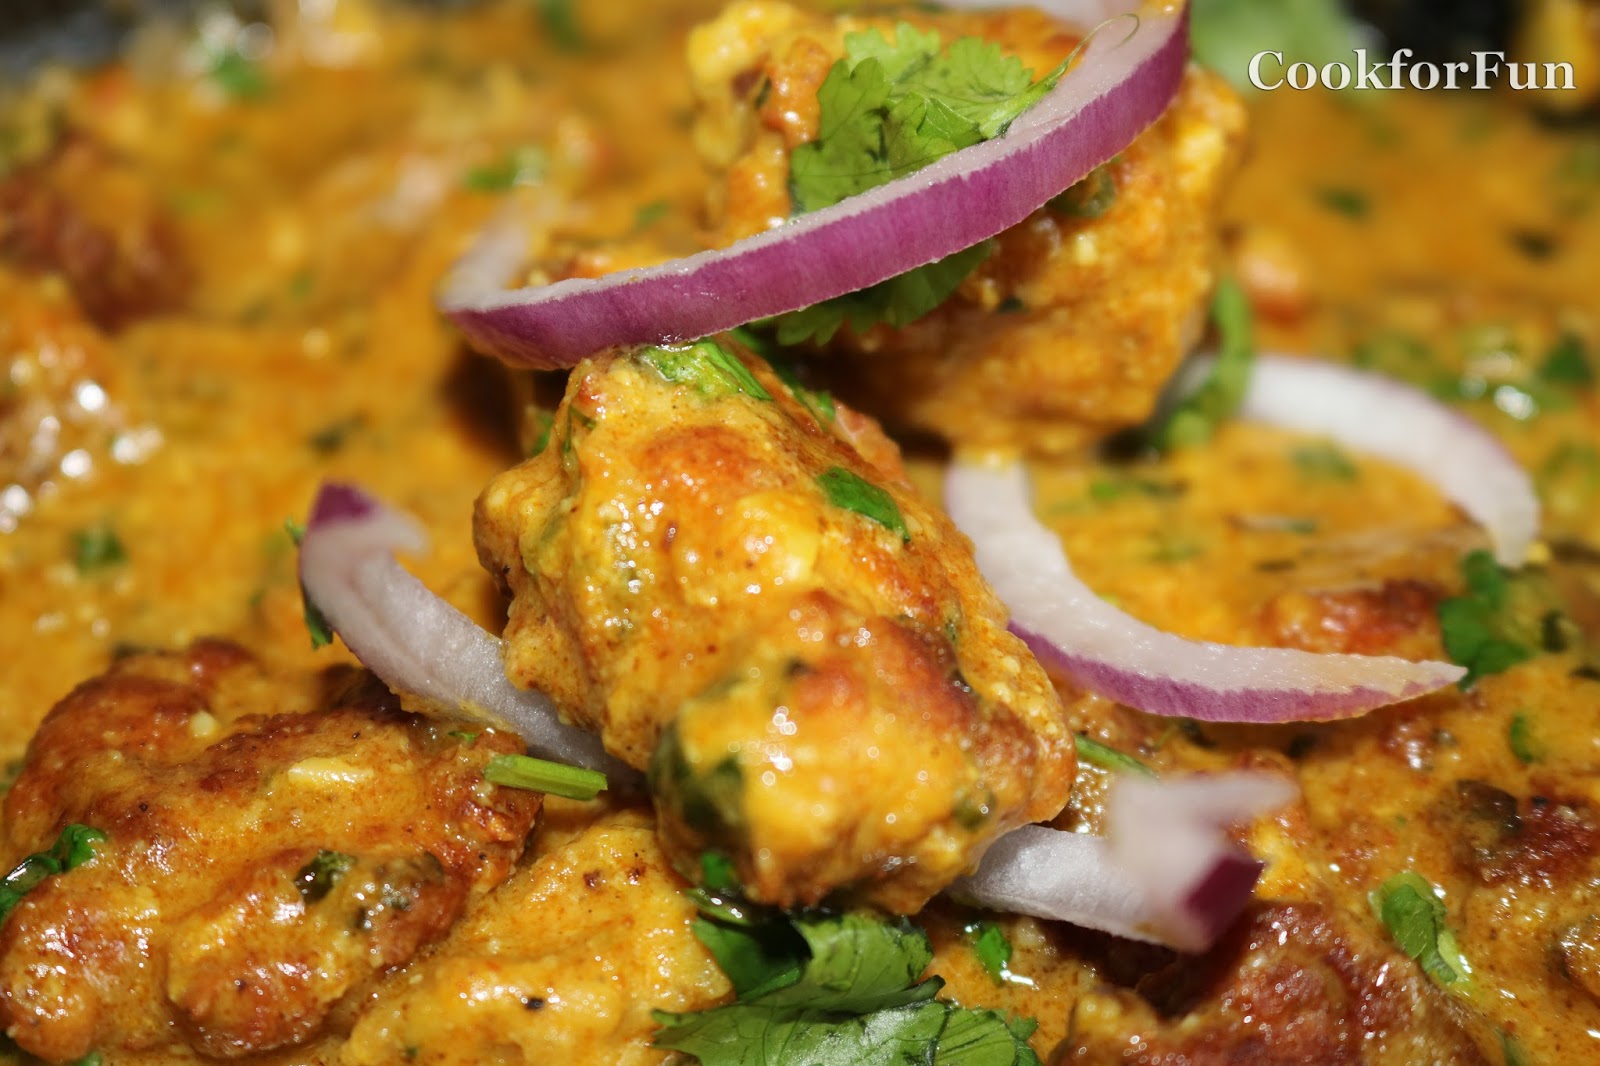
Recipe : Chicken Dum Biryani
Prep time : 12 hours 
Cooking time : 1.5 hours
Serves :6 
Cuisine : Indian
Course : Main
Ingredients :
  1. 2 cups Basmati rice
  2. 500 grams chicken with bones
  3.  2/3 cup of yogurt + 1/4 cup milk
  4. 1 tsp ginger paste
  5. 1 tsp garlic paste
  6. 1/2 tsp of each of the following :
    1. Cumin powder
    2. Garam Masala powder
    3. Tumeric Powder
    4. Red Chilli Powder
  7. 1 tsp of coriander powder and chicken spice mix each
  8. Salt and Pepper to taste
  9. 18 green cardamoms + 15 cloves+ 5 one inch pieces of cinnamon + 4 bayleaves
  10. 2+4  tbsp  of oil or ghee
  11. 2 large onions , sliced 
  12. A large pinch of saffron
  13. 1/2 cup milk
  14. 3 soft boiled eggs
  15. A dough made of  1 cup of wheat flour and water
Procedure :

  1. Take your chicken , add the yogurt and milk. Add salt and pepper, cumin, coriander, garam masala, chicken spice mix, tumeric, red chilli powder, ginger paste and garlic paste. Mix thoroughly . Cover and marinate overnight in the fridge.
  1. Next morning. Wash the rice multiple times until the water runs almost clear and then soak the rice at room temperature until the grains swell and become opaque.
  2. Boil 8 cups of water with salt and whole spices , i.e. cardamoms, cloves, cinnamon and bay leaves. Add the rice and boil until rice is 70% cooked. This should be at 6-8 minutes on high heat. Drain ( you may add 2 tbsp of ghee at this point and mix the rice) Reserve until needed.
  3. Heat 4 tbsp of oil in a pan and add the slices onions with a pinch of salt . Cook on low , ocassionally stirring until the onions are browned . Drain on a kitchen paper.
  4. Soak the saffron in milk and let it sit.
  5. In a kadai/wok, heat the remaining oil and add the chicken with all the marinade. Cook on medium until the chicken is 70% cooked and most of the moisture has vaporised and the curry is separating oil at the edges. Remove from heat.
  6. Take a really thick , deep pot with a lid. Brush oil/ghee on the base and the sides. Place 1/rd of the rice . Place 3 pieces of chicken along with 1/2 the gravy (place the larger and tougher pieces like the thigh). Sprinkle 1/3rd of fried onions and few tbsps of the saffron infused milk. Repeat, place eggs in this layer too.  Add the final layer of rice, onions and saffron milk. 

  7. Roll a long log from the dough and attach it along the circumference of the pot. Place the lid. Cook the biryani on the lowest setting of the gas for about 30 minutes. Turn off the gas and let it sit on the burner for another 30 mins. 
  8. Serve immediate with raita and papad.
Optional : If you prefer , you can use a few drops of rose water or kewda water. I don't prefer the aroma so I left it out.
What do you  think of this recipe ??? Please rate and it would be even nicer if you left a comment and shared this recipe on your social media. 

Salted Creme Caramel


With my intense addiction to desserts in general, I try to make every thing at home, preferably from scratch (I would even grow my own produce if I had the means) . This serves two purposes : 1.It tastes much better and quality is under my control. 2. I don't have to dine at fancy restaurants and burn a hole in my pocket.  Creme Caramel is a French Classic dessert, it basically Creme BruleĆ©, without the caramelised top which is so satisfying to break into. Caramel custard is also a variation , where the sugar is caramelised and is in liquid form as a sauce over the set custard. Its famous in Mexican cuisine and is called Flan. These basically have the same base. Creme = Cream and Caramel=Cooked Sugar to a point before burnt. This is a fairly easy dessert, takes no more than 20 minutes of active time, can be prepared the day/night before,  keeps in the fridge for a good 3 days (although I guarantee it won't stay that long). Here are some foot notes :


  1. Texture. There is a prefernce when it comes to the texture of a custard. I like mine creamy and just set, but like it to hold its shape when I spoon it. Something like the picture above. This is primarily achieved with egg yolks, the more egg yolks , firmer the texture. But whatyou want to strike is the balance between firm and custardy, with the cream. Most recipes use milk as a thinner , because an all cream base would be too rich, even for me and also it could burn easily.
  2. Do not Burn the Caramel. Caramelising anything is pretty technical. You need to cook the sugars on the verge of burn but save it from burning and apart from being extremely risky to handle (caramel can give you 3rd degree burns, so be careful), it goes from caramel to burnt , bitter, inedible mess in literally seconds.If you do burn it, discard and start again. There is no known way to save burnt caramel.
  3. Texture development with chilling. This is no good warm or cold . This has to chill for at least 6 hours before you even think of digging into. You need that time for the texture and flavor to develop and the residual eggyness to go away.
Recipe : Salted Creme Caramel
Prep time : 6.5 hours 
Active time: 30 mins
Serves : 2
Cuisine : French
Course  : Dessert

Ingredients
  1. 1/4 cup sugar
  2. 1/2 cup of cream 
  3. 1/4 cup milk
  4. 3 large egg yolks
  5. 1 tsp of vanilla extract
  6. pinch of salt.
Procedure :
  1. In a heavy bottomed pan, place your sugar on medium heat. Swirl the pan around. Do not stir. Just don't OK. Keep swirling until all the sugar is melted and you  have a dark caramel.
  2. Add the cream and stir. Turn the heat to low.There will be bubbles and steam , so be careful. Whisk. It will look like you have messed up because the caramel will solidify. Its ok, thats how it is supposed to look like. Continue whisking. 
  3. Add the milk and  continue to cook on low.
  4. In a bowl with three large egg yolks, pour your caramel mixture in a thin, steady stream , whisking continuously. This has to be done this way only because you want to shock the yolks with heat and temper them but you don't want scrambled eggs , so whisk to distribute the heat instantly.
  5. Place the contents back to your pan and whisk again for about 30 seconds.
  6. Place the pan back to the lowest mark on your stove and whisk continuosly until the mixture reaches the creme anglaise consistency, meaning , it will coat the back of your spoon or the bottom of your pan.
  7. Pour your caramel mixture into oven proof pudding moulds or ramekins. Remove air bubbles by first tapping, then running a toothpick along the liquid and then with a spoon (you may find this being nit-picky, which it is, I am low key OCD)
  8. Place on a baking dish, fill half of the dish with boiling water and place it in a preheated 160℃ oven for about 40 mins(this will depend on your oven), until the custard is set. It will no longer jiggle when you shake it.
  9. Cool to room temperature, cover will cling and refrigerate for at least 4-6 hours.
  10. Serve chilled. 
              
What do you  think of this recipe ??? Please rate and it would be even nicer if you left a comment and shared this recipe on your social media. 

Indo Chinese Crispy Baby Corn Chilli with sesame seeds


I only recently started using baby corn as a staple in my kitchen. About for two years. Since I am married to a vegetarian ( No eggs even ! Yeah, no eggs! ), I constantly look for new vegetables to cook with. My husband really is not that fond of baby corn, but this dish , he just gobbles up. This is a fairly simple dish, a small list of ingredients and not a lot of technique involved . The flavors and cooking style is a rip off the Chinese stir fry . It has got the classic balance of sweet, salty and spice. Its very playful on the palate and here I cannot fight the urge to quote the movie "American Psycho" and call it "a playful little dish" ( please read this in Christian Bale's voice ). As I said , there is not a lot of technical points to remember while making this dish, but to enjoy it at its best, here are a few tips:

  1. Baby Corn is a vegetable best enjoyed at its freshest. The sugars in the corn will start converting into starch the moment it is detached from its parent plant and the sweetness  will start to fade . This process is slowed down at a low temperature . So , if you are not using it straight away, store your baby corn in the fridge.
  2. Do not overcook (Never overcook anything ! You will ruin it )This recipe uses thrice cooked method- Parboiling, frying and then stir frying. Go a little overboard with one of them and you better throw your baby corn out of that kitchen window of yours.The best texture is when the baby corn is a little crisp on the exterior and has a crunch when you bite into it. This vegetable is naturally water retenant, since the core has a lot of water in it , so there is really not a lot  of ways you can dry it out too much (well  if you leave it in the oven for 4 hours , you may succeed) but overcooking will ruin the texture.
  3.  Drying and Frying correctly- This is imporatnt, If you want to avoid soggy baby corn. When you parboil the baby corn , it WILL absorb water. You must dry the pieces before frying. Please don't be lazy and skip this. Use paper towels. Get as much water out of it as possible. This will ensure the pieces will not  turn out soggy. Frying these  correctly is equally important. Your oil needs to be hot and has to continue to be hot. Do not overcrowd the pan . This will bring the temperature of the oil down and the oil will absorb into the vegetable and result in a soggy piece rather than a crisp piece .
Recipe : Crispy Babycorn Chilli with sesame 
Quisine  : Indo Chinese 
Prep time : 10 mins (only chopping and cutting, this can stretch upto 15 mins if your knife skills are like mine )
Cooking time : 25 mins
Serves : 3-4 
Course : Starter / Entree ( Goes extremely well with drinks as said by my husband )

Ingredients :

  • 1 + 1/4 cup baby corn
  • 1/4 cup plain flour
  • 1/8 cup rice flour
  • 1/8 cup  corn flour
  • salt and pepper to season
  • flavorless oil for deep frying and later stir frying
  • 1/4 cup finely chopped onion
  • 1/4 tsp minced garlic
  • 1tsp julienned ginger
  • 1/4 cup chopped capsicum/ bell pepper
  • 1 tbsp dark soy sauce 
  • 2 tsp sugar 
  • 3 green chillies , chopped 
  • 2 tsp toasted sesame seeds
Procedure :   
  1. Cut the baby corn into 1 inch pieces . For the fatter ones , slit through the middle and then cut it.
  2. Boil a pot of water, add a generous pinch of salt and 2 tsp of sugar. Add the baby corn and boil on high for 5 mins. Remove from heat, drain and dry thoroughly.
  3. Take a large bowl, add the flours , salt and pepper. Whisk. Add the baby corn and coat. Shake excess flour off.
  4. Heat a wok/ kadai and add oil. Fry the baby corn in batches . Donot overcrowd the pan. You will end up with soggy baby corn. Fry until lightly golden and remove on a kitchen towel.
  5. Heat about a tbsp of oil in the wok. Add the garlic and ginger , saute for 30 secs on high. Add the onion and saute on medium for 2 mins . Add the capsicum and saute for a minute ( No more ! You don't want to eat an overcooked capsicum)
  6. Add the baby corn, soy sauce, salt and pepper.
  7. Add green chillies .
  8. Add 1+1/2 tsp of sesame . Stir for 10 secs on high.
  9. Serve immediately (this is no good at room temperature, cold is even worse), garnished with the rest of the sesame seeds.


Creamy Mango Sorbet without Ice Cream Maker


Sorbet is basically sweetened , frozen fruit puree.  Its a perfect way to have your overriped fruit and replace ice cream . The word "sorbet" is derived from the Arabic word "Sharbat" (fragrant mashed fruit drink).[1] However, the root is present in such Indo-European languages as Greek and Persian for example (shoutout to Wikipedia). The most famous and generalized form , which is the American Sorbet is a fruity frozen dessert which is not diary  based. Now , there is a certain science to sorbet which I will get into detail later on, in the following points :
  1. Choice of fruit . Your sorbet is as good as the quality of your fruit. Get the best one you can buy. Also consider the type of fruit. For example, I am using mangoes and mangoes , in a sorbet, is one of the easiest to deal with. Stone fruits like mangoes, peaches , etc are easiest to work with because they have a higher content of pectin which is basically responsible for the thicker , creamy texture. Raspberries and strawberries are very common flavors , and although they are less in pectin content, they have a lot of body which is again responsible for a creamier texture.The most difficult for me is lime sorbet (that may also be because I am a shitty cook). Freezing lime juice and sugar syrup into something creamy is difficult and it will be grainy, but thats how it is supposed to be since it acts as an excellent palette cleanser in a multi course meal.Whatever be your choice, try and get the best quality and if you are a beginner, I recommend using the more full bodied fruits. Its summer ! there is an abundance . Strawberries, mangoes, peaches , plums (I have even used dragon fruit and it came out well)
  2. Stage of fruit cycle. Use over riped fruits. Remember the sweeter your fruit is , the lesser the sugar to be added( I will get to sugar science in the next point). Also , a fruit that is under riped is basically firmer in texture which means if you are looking for softness and silkiness in your sorbet, its probably not a good idea to choose an under riped fruit. You can cook the fruit to soften it but to me its a sorbet crime because fruit is best when its fresh (thats the whole point of a sorbet) and cooking , no matter how delicate will take away some of the freshness. In some cases however, cooking may be the better option like quince sorbet, but this is rare.
  3. Sugar Content (the most important). The sugar will make your sorbet a sorbet or a slush. the freezing and final texture is all dependent on the sugar content. Too much and you have ice , too little and you have slush (you can eat it either ways , but it won't be a sorbet). The general rule is : 4 cups fruit puree to 1 cup sugar . Don't believe me , its what pastry chefs use. The ideal sugar content is 23-25% to get the ideal texture. This is not exactly a rule I follow to the T because I don't have an ice cream machine(and this ratio is mostly for ice cream machines) and my method does not actually require this particular ratio to work (You'll see) but I do try to keep the sugar content to around 20% of fruit. I personally prefer less sugar because I still want the natural tartness of the fruit to come through . My husband on the other hand prefers a sweeter note to his sorbets. This 4:1 ratio is also called the master ratio by pastry chefs.
  4. Alcohol. If you want your sorbet to stay scoopable , add some alchohol , it reduces the freezing point keeping your sorbet soft. This is purely optional and my method will give you creamy with or without alcohol . This is also a good excuse to day drink.
  5. No icecream maker. The very technique an ice cream maker uses is to incorporate air while freezing . This prevents formations of sharp ice crystals which is a risk with freezing sugar molecules. However, it is possible to mimic if not replicate this effect. You will need to pay a little more attention though, still less expensive than buying an ice cream machine.
  6. Eat it in time. Its fresh fruit, it wont last forever so enjoy it in its time. Adding alcohol will help a little but I still recommend finishing a batch (that is 4 cups of fruit puree) in a week at most.
Recipe : Mango Sorbet
Prep Time : 6 hours 
Serves : 4
Course : Dessert, Summer Treat.

Ingredients :
  1. 2 cups fresh Mangoes 
  2. 4 medium sized mangoes which should give you 2cups of puree.
  3. 1 and 1/2 tsp of fresh lime juice (I am using a variety of mango that is naturally on the tart side , so adjust the lime juice accordingly)
  4. Pinch of salt and by pinch I mean 1/4 tsp
  5. 1/2 cup of sugar
  6. 1/4 cup water
  7. 1 tsp brandy( rum will also work well)
Procedure : 
  1. Cut your mangoes into cubes and freeze . I did mine over night but if you wack your chiller to max, it should freeze in about 4 hours.
  2. Prepare a sugar syrup but heating water and sugar. You don't need to boil this. Chill in the fridge.
  3. Puree the mango in a blender until very smooth. Remember some varieties of  mangoes have fibrous strands. If your puree is fibrous , strain through a sieve to get rid of them.
  4. Add the sugar syrup, salt and lime juice and blend.
  5. Add the alcohol.
  6. Transfer to a shallow dish, Cover with cling and place it in the freezer at max power, meaning he chiller is at its maximum freezing power and lowest temperature.
  7. At intervals of around 45 mins , take it out , fork it around and place it back. This is to break any large ice crystals . Do this 3-4 times . Then place in an airtight container and freeze overnight or 6 hours.
  8. At this point your sorbet will be  granita like in texture(the 1st picture below) which is fine to serve, however, of you want a real next level sorbet orgasm, blend it one last time. This is basically blend the ice crystals into puree making it soft serve ice cream like.

Charred Oven baked Tangy Cauliflower

Cauliflower is one of my favorite vegetables. I love to eat it, I love to cook with it, I love to feed it to my guests and my husband loves it too. We have it almost everyday. It can be an entree, a main and a snack. This particular preparation can be served as an entree or a snack, accompanied by a mug of beer, especially if you are entertaining a vegetarian guest. It is super easy, not a lot of spice to it . It takes a little longer to cook because I cook it in the oven but you will realize that the wait is worth it. 

Technical points to remember :

  1. Cooking time . This recipe takes about 40-50 mins in  the oven depending on your oven ( I have a large oven with hot spots). That sounds like a lot for a vegetable and yes it is. But it is important to cook the cauliflower in an indirect heat so as not to burn the marinade over it. Also, I like my vegetables with a little bit of bite to them. If you like yours well done then let them be in the oven for an extra 10 mins, it really depends on how you like it ( I served these to my mother and she basically accused me of serving her under cooked cauliflower ). Having said that, I recommend not overcooking these as not only it ruins the texture and flavor but it will also result in loss of those precious nutrients)
  2. Marinating time . You can marinate this ahead of time or even leave it overnight in the fridge (place it in the coolest part of your fridge ) . Marinating at room temperature will take only an hour max, since room temperatures catalyse the marinating process. Also remember that this is not a meat. We are not looking to tenderize it. What we want is the flavor and seasonings to penetrate and 1 hour is enough for that.

Recipe : Charred Oven baked Tangy Cauliflower
Cuisine : Indian
Prep time : 1 hour 10 mins 
Cooking time : 40-50 mins 
Serves : 3-4  a

Ingredients :

  • 1 medium cauliflower, separated into large florets (refer to video). Do not make the florets small. They will turn to mush when you cook them.
  • 1/2 cup thick yogurt
  • 1/8 cup of lime juice ( fresh is preferred but you can use bottled too)
  • 1/2 tsp garlic paste
  • 1/2 tsp tumeric powder
  • 1/2 tsp of ground cumin.
  • Salt to taste
  • 1 tbsp finely chopped onion
  • 2 tbsp vegetable oil 
Procedure :
  1. Blanch the cauliflower in salted water for 3 minutes. Drain and let air dry.
  2. In a mixing bowl, place  yogurt, tumeric, cumin , garlic , onion , salt and mix
  3. Add cauliflower  and mix. Cover with foil and let it marinate at room temperature for 1 hour.
  4. Preheat the oven at 200℃ . Place the florets on a baking sheet , brush with oil and bake for 10 minutes. Rotate the pan and bake another 10 minutes. Take it out, flip the florets and brush with oil. Bake for 10 minutes at the end of which rotate and bake for a final 10 minutes.
Serve hot.
            

Lightly spiced dry fruit vegetable Pulao


We Indians and our rice. Rice is a staple out here, especially in the north east and south.  We have a large variety of rice preparations, savory and sweet ; mild to full on spice, rice for life changing occassions like a wedding to rice to soothe that destroyed digestive system after that so called wedding (khichidi) .What I am going for today is lightly spiced , slightly sweet pulao. It has cinnamon, cardamom and cloves as main spices , loaded with carrots, beans and peas and for that crunch I added nuts . For a slight tangy sweetness, raisins. I made this the day I made my chicken kofta dish , which is a match made in heaven and if you are looking for a vegetarian accompliment for this, any paneer or potato gravy dish will be great. Just use something which has enough gravy because this by itself would be a little dry. This is a quick one and can be stored in the fridge for upto 48 hours, the texture is not lost when reheated and its very mild, so it goes very well with heavy curries without being overpowering.

Some technical points :

  1. Choice of rice  and its treatment. Pulao is traditionally made with long grain basmati rice, primarily because it has low starch content and is very fragnant and any kind  of basmati rice will work fine with this. What you need to focus on is getting as much starch out of your rice as possible . Wash your rice multiple times, the water will get less and less cloudier with each rinse , I wash my rice around 4-5 times. Soaking the rice will soften those outer walls and break them down, it will cook faster and you need to time it accordingly. As soon as the rice is 70% cooked , immediately remove and drain. Remember, they will continue cooking and will be pan fried later.
  2. Seasoning. There is no seasoning in this pulao other than salt and sugar. You may see the recipe and think , woah! thats a lot of sugar! (2/3rds of a cup. yes . you heard that right ). However, this has sweet undertones and secondly, we are boiling the rice in a lot of water and the seasonings will be diluted.
Recipe : Lightly spiced dry fruit vegetable Pulao
Cuisine : Indian
Prep Time : 30 mins
Cooking time : 35 mins
Course : Main
Serves : 4

Ingredients : 
  1. 1 cup basmati rice
  2. 10 green cardamons
  3. 3 large pieces of cinnamon
  4. 8 cloves
  5. 3 bay leaves
  6. 2 tablespoon ghee (Please use the best quality you can get)
  7. Salt to taste
  8. 2/3 cup sugar
  9. 1 cup chopped carrots and green beans 
  10. 1/4 cup peas
  11. 1/4 cup chopped paneer
  12. 12 cashews
  13. 12 almonds
  14. handful of raisins
  15. 3 tbsp of vegetable oil
Procedure : 
  1. Wash the rice thoroughly and let it soak for 30 mins.
  2. Soak the raisins and cashews in room temperature water and soak the almonds separately in hot water.
  3. In a large pot add water ( about 8 cups) and bring to a rolling boil.
  4. Add the cardamom, cinnamon, bay leaves and cloves along with salt and sugar.
  5. Add the rice and cook on high until he rice is tender but has resistance.
  6. Drain the rice and cool until you can touch it comfortably.
  7. Fish out the whole spices(they have done their job)
  8. Add the ghee and  stir the rice. Reserve till needed.
  9. In a large pot, add oil ,
  10. Add in the vegetables and saute . Add salt to taste.
  11. Remove the almond skins (it will be a piece of cake after the soaking)
  12. Add the nuts and raisins to the pot. Cook for 4-5 mins of medium of until the vegetables are slightly tender but not soft.
  13. Add the rice and combine everything well.Cover and cook until the rice is fully cooked.
  14. Serve immediately.

Moist Mini Chicken Kofta in Cashewnut Curry


I have had many a kofta curries in my life and let me tell you, not all are perfect. Koftas are an Indian main course dish of spiced meat balls cooked a curry sauce and served generally with a rice or flat bread (roti, naan, etc) preparation since you need a perfect delivery system for that awesome curry sauce ! Yes ! 
 We often come across koftas that may turn out dry . The main reasons for this are 
  • Overcooking the meat
  • Packing it too densely while forming the balls
  • Using the wrong cut of meat.
  • Not using enough moistening agents to the mix.
Some technical points to remember for this recipe:
  • Using the right cut of meat is crucial . The  best cut of this preparation is chicken thigh . Why ? you ask ? Well when you cook a protein the water in it vaporises and thus it shrinks. The more you cook, the dryer it becomes. The saving grace in retaining moisture is fat. Now , if you regularly cook with chicken , you know that although the breast is considered to be a primary cut, it does not have a lot of fat in it. Thus , it can get dry and stringy very quick. Chicken thigh considerably has a much higher fat content and when that fat melts , it penetrates that meat and the result is a juicy meat ball.
  • Introducing moisture in the other forms ensures you do not stuff up your dish. So I use milk and eggs.
  • Do not overcook ! This is the most common error in cooking proteins . This dish uses two cooking techniques - frying and then cooking in the curry and its very important that the cooking time be divided and not added . What you want is maximise flavor and texture of that meat, not a dry , bouncy tiny tennis ball in your mouth.
  • Use teaspoons rather than rolling balls with your hands . When you roll the meat mixture between your palms, you are pressing the proteins tightly together making it dense which may result in chewiness. I suggest using teaspoons to gently drop the mixture into the oil which will ensure lightness and although they may not turn out round , they will taste heavenly.
  • Do not make large balls. This is another technical error. When you make a large meat ball , the innermost meat will cook at a different rate than the outer layers which means the outer layers are getting dryer by the minute . Technically, the chicken cooks when the internal temperature reaches 75 C or 165 F and by the time that internal temperature of your large meat ball reaches the cooking temperature, the outer parts will go dry. So less is more ok.
Well this recipe guarantees the moistest (if its even a word), juiciest chicken koftas you have ever tasted ( No ! I am not kidding ). Just follow it meticulously and you will never make them any other way. They can be cooked in any choice of sauce. I am doing a cashew nut curry today because I am extra ! but you can do a tomato based sauce , a yogurt sauce or even serve them fried as a snack. You do your thing .

Recipe : Chicken Kofta Curry
Cuisine : Indian 
Prep time :  20 mins
Cooking time : 30 mins 
Serves : 4 (3 if you are a savage like me )

Ingredients :
  1. For the koftas (meat balls)
  • 1 cup ground chicken thigh (please don't use breast, it won't be as good)
  • 1 slice of white bread crust removed preferably a day old
  • 4 tablespoons of milk (full fat would be nice but skimmed will do)
  • 1 room temperature egg
  • 1 tsp minced garlic
  • 1/2 tsp ginger paste
  • 2 tbsp finely chopped onion
  • 1 tbsp chopped coriander
  • salt and pepper to taste
  • any flavorless oil for frying like vegetable oil or canola oil
      2. For the gravy 
  • 1/4 cup cashewnuts
  • 3 whole garlic cloves
  • 1/2 tsp ginger paste
  • 1 small onion roughly chopped
  • 1 small tomato roughly chopped
  • 3 whole green chillies
  • 1/2 tsp tumeric powder
  • 1 tsp chicken masala powder (premade)
  • 1 tbsp kasuri methi (dried fenugreek leaves)
  • chopped coriander for garnish 

Procedure :
  1. Place the bread and milk in a bowl and let it sit for about a minute. Mix it with a spatula.
  2. Add the egg .
  3. Add the garlic, ginger , onion and coriander and mix thoroughly.
  4. Add the ground chicken and then the seasoning.
  5. Mix until just incorporated. Do not overwork the meat.
  6. Heat oil for shallow frying in a pan and spoon the mixture into it. Use about 1/2 a tsp per meat ball and do not over crowd the pan . This will bring the temperature of the oil down and result in uneven cooking.
  7. Cook each side for about 2-3 minutes on medium heat  and remove on a kitchen towel to soak the excess oil. We are cooking the meat balls half way because they will cook in the curry later.
  8. There will be remaining oil in the pan. Transfer this oil to a deeper pan ( a kadai or a wok). Add in garlic, ginger and onion and saute for a minute.
  9. Add the tomato and saute for another 2 minutes on medium heat.
  10. Cool this onion tomato paste and grind it into a paste using a blender.
  11. Add this again back into the pan and fry for about 2 minutes.
  12. Add the tumeric and chicken spice mix . Cook until the oil starts to separate around  the edges of the pan.
  13. Add water ( about a cup) and season.
  14. After the curry boils , add the meat balls . Cover and simmer for about 8 mins.
  15. Add the cashew nut paste , and simmer for 2 minutes.
  16. Switch off the flame , add chopped coriander .

Serving : This is a main course dish and is best with some rice preparation (plain steamed rice, lightly spiced rice like a dry fruit pulao, ghee rice, etc) or a flat bread ( roti, rumali roti, naan , kulcha , etc). This tastes best served immediately )

You can store this dish in the refrigerator for upto a day. However, when you re heat it, make sure not to boil it and overcook the meat again.

Note : The measuring spoons and cups used in this recipe are the standard.